House of Botany, save Plants save planet!
Vermicomposting at Home: A Step-by-Step Guide to Creating Nutrient-Rich Compost
Vermicomposting is an innovative process that utilizes various species of worms, notably red wigglers, to decompose organic waste into nutrient-rich compost. This method not only aids in waste reduction but also contributes significantly to sustainable gardening practices. As home gardeners and eco-conscious individuals seek efficient solutions to waste management and soil enrichment, vermicomposting emerges as a practical alternative to traditional composting.
Sam
1/17/20258 min read
Introduction to Vermicomposting
Vermicomposting is an innovative process that utilizes various species of worms, notably red wigglers, to decompose organic waste into nutrient-rich compost. This method not only aids in waste reduction but also contributes significantly to sustainable gardening practices. As home gardeners and eco-conscious individuals seek efficient solutions to waste management and soil enrichment, vermicomposting emerges as a practical alternative to traditional composting.
One of the primary advantages of vermicomposting lies in its ability to recycle kitchen scraps and other organic materials, transforming them into valuable compost. This process decreases the volume of waste that ends up in landfills, aligning with broader environmental goals of reducing household waste production. The worms break down the organic matter at an accelerated rate compared to conventional methods, leading to quicker composting cycles and an overall more efficient disposal system.
The nutrient profile of vermicompost is another significant benefit. Worm castings are rich in essential nutrients, such as nitrogen, phosphorus, and potassium, which are vital for plant growth. Additionally, vermicompost is known to enhance soil structure and moisture retention, fostering healthier plants and improving yields. This natural fertilizer is free from harmful chemicals, making it an excellent choice for organic gardening and healthy food production.
Moreover, vermicomposting is an educational experience that encourages individuals to engage with their waste and the environment more consciously. By integrating vermicomposting into daily routines, households can cultivate a deeper understanding of sustainability. Overall, the numerous benefits of vermicomposting make it an invaluable practice for anyone looking to enhance their gardening efforts while contributing positively to the environment.
Choosing the Right Worm Species
When embarking on the journey of vermicomposting, selecting the appropriate worm species is paramount to ensuring effective composting. The most commonly used species for this purpose is the Red Wiggler (Eisenia fetida), known for its voracious appetite and exceptional composting capabilities. Red Wigglers thrive in a variety of conditions, making them ideal for home composting systems. They can consume a large amount of organic waste, transforming it into nutrient-rich compost efficiently. This species is particularly adept at breaking down kitchen scraps, such as vegetable peels and fruit remnants, facilitating a faster decomposition process compared to many other worm types.
In addition to the Red Wigglers, there are other worm species that can be considered for vermicomposting, including the European Nightcrawler (Eisenia hortensis) and the African Nightcrawler (Eudrilus eugeniae). While these species also possess composting qualities, they may be less suited to the indoor environments typically utilized for home composting. The European Nightcrawler, for example, is larger and generally better adapted for outdoor environments, whereas the African Nightcrawler prefers warmer conditions, which may not be ideal for all users.
When selecting worms for your composting setup, factors such as availability and performance should be taken into account. Red Wigglers are widely available and can often be found at local gardening centers, bait shops, or through online suppliers specializing in compost worms. It is advisable to source healthy, active specimens to ensure that they will thrive in your composting environment. Moreover, it is beneficial to consider the volume of organic waste you intend to process, as this will help determine the quantity of worms needed for optimal performance.
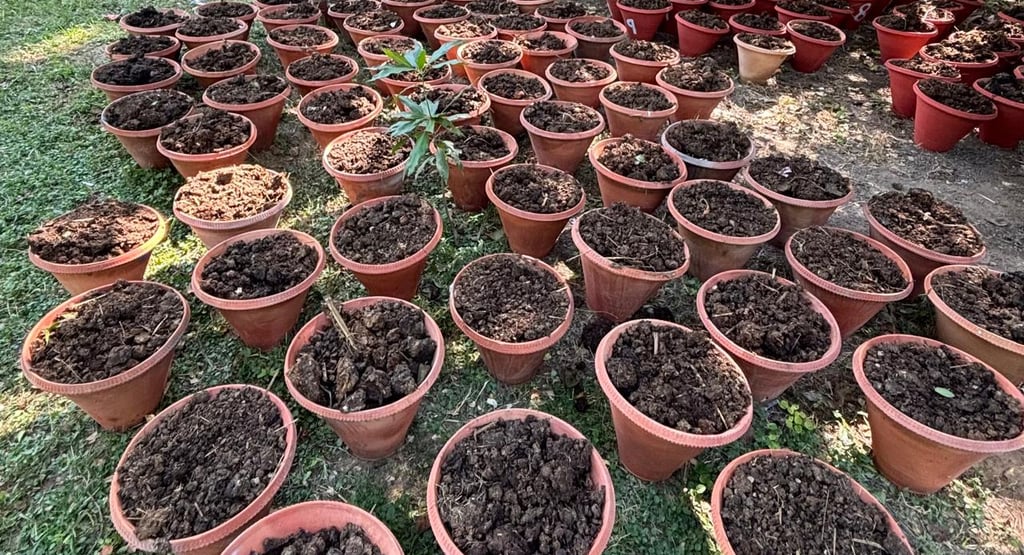
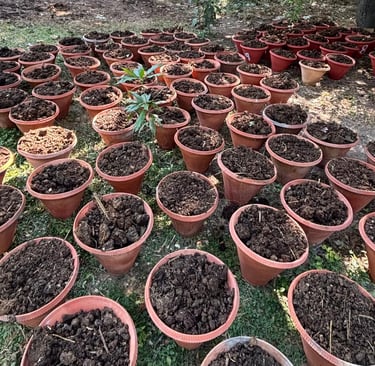
Setting Up Your Vermicomposting Bin
Creating an efficient vermicomposting bin is essential for successful composting at home. The first step involves selecting an appropriate container, which can be wood, plastic, or fabric. Each material has its benefits; for instance, plastic bins are lightweight and durable, while wooden bins offer insulation and aesthetic appeal. Regardless of the material, the size of the bin should be based on the number of worms and the amount of kitchen scraps you plan to compost. A bin measuring 2 feet by 3 feet is typically ample for a household.
Next, prepare the bin for the worms, which requires a few preparatory steps. Begin by drilling small holes in the sides and lid of the container to allow for proper aeration. Adequate airflow is crucial as it enhances worm activity and decomposition rates. Additionally, providing a drainage system is vital to prevent excess moisture, which can create unfavorable conditions for the worms. You can achieve this by placing a layer of small rocks or gravel at the bottom of the bin.
Once the bin is ready, it is time to prepare the bedding, which should consist of shredded newspapers, cardboard, or coconut coir. Create a bedding layer that is about 6 to 8 inches deep, ensuring it is moistened but not too wet. After preparing the bedding, release the worms into the bin. It is essential to maintain ideal conditions within the bin to support their health and productivity. The ideal temperature for vermicomposting is between 55°F and 77°F (13°C to 25°C), while moisture levels should be regularly checked to keep the bedding comfortably damp. By ensuring these optimal conditions, your vermicomposting bin will become a thriving environment for worms to transform organic waste into nutrient-rich compost efficiently.
Feeding Your Worms
To ensure the success of your vermicomposting efforts, providing an appropriate diet for your worms is crucial. Red wigglers, the most commonly used type of worm for composting, thrive on a variety of organic materials. Suitable foods for worm composting include vegetable scraps, fruit peels, coffee grounds, and crushed eggshells. These items not only offer a nutritious diet for the worms but also help in accelerating the decomposition process. It's essential to include a mix of both carbon-rich (browns) and nitrogen-rich (greens) materials to maintain a balanced diet for your worms.
Carbon materials, such as dried leaves, shredded paper, and cardboard, serve as food sources that provide necessary energy. On the other hand, nitrogen materials, like kitchen scraps, vegetable trimmings, and grass clippings, are rich in proteins and promote microbial activity in the compost. Striking the right balance between these carbon and nitrogen sources is vital for sustaining a healthy worm population in your composting system. The ideal carbon-to-nitrogen ratio is about 25-30:1, which will help support worm growth and aid in efficient composting.
When managing worm feed, it's important to avoid overfeeding. Worms can only process a limited amount of food at a time, and excess scraps can lead to odors and the attraction of pests. To prevent overfeeding, monitor the compost regularly and only add food when the previous batch has been consumed. Additionally, refrain from adding harmful substances such as citrus peels, onions, garlic, and meats, which can disrupt the delicate balance of the compost ecosystem. By carefully managing the diet and feeding practices, you will facilitate the creation of nutrient-rich compost and support the health of your worms.
Maintaining Your Vermicomposting System
Maintaining a healthy vermicomposting system is crucial to ensure optimal conditions for the worms and efficient compost production. One of the primary factors to manage is moisture levels within the compost bin. It is essential to keep the material moist, similar to a damp sponge, but not overly wet. Excessive moisture can lead to anaerobic conditions which are detrimental to the worms. To achieve the right moisture balance, periodically check the bedding materials and add water or dry carbonaceous materials such as shredded newspaper or cardboard as necessary.
Another important aspect of maintenance involves monitoring for pests. Fruit flies and other insects may be attracted to the food scraps; however, they can often be managed through proper bin management. Avoid adding too much food at once and ensure that the bin is covered adequately to deter pests. Additionally, regular inspection of the compost can help identify any pest-related issues early on, allowing for immediate corrective action.
Aeration is also a key component in sustaining a thriving vermicomposting environment. The worms require oxygen to survive, and compacted material can hinder airflow. Gently mixing the compost periodically helps to aerate it and distribute moisture evenly. Likewise, maintain a diverse diet for the worms to ensure they receive a range of nutrients essential for their health. Assessing the worm population's health is integral as well; look for signs of active feeding behavior, such as burrowing and breakdown of organic matter. Should the population decline, it might indicate environmental stress or insufficient food.
To troubleshoot common issues, observe the compost's odor and temperature. A foul smell might signal excessive moisture or anaerobic conditions, while elevated temperatures could indicate overcrowding or inadequate ventilation. By addressing these key maintenance factors, you can enhance the productivity and efficiency of your vermicomposting system.
Harvesting Vermicompost
Harvesting vermicompost is an essential process in the vermiculture cycle, as it enables gardeners to utilize the rich, organic matter produced by earthworms to enhance soil fertility. The ideal time to collect vermicompost typically occurs when the majority of the material in the bin has transformed into dark, crumbly soil-like substance. Generally, this takes about two to three months after the initial introduction of food waste. There are several signs to look for, including a distinct earthy smell and a reduction in visible food scraps.
When it comes to the actual harvesting of vermicompost, two popular methods are commonly employed: the bait method and the light method. The bait method involves placing pieces of fruit or vegetable scraps on one side of the bin. After a few hours, the worms will migrate toward the bait, allowing you to collect the compost from the other side where most worms have cleared out. This not only makes harvesting easier but also minimizes disturbance to the worms.
The light method, on the other hand, entails exposing the worms to a bright light source. Worms naturally avoid light and will burrow deeper into the bin when illuminated, allowing the top layers of vermicompost to be harvested with minimal interruption. Once the compost has been collected, it is essential to separate any remaining worms. This can be done by gently sifting the compost through a screen or by hand-picking the worms, which can then be returned to the bin for further composting.
After successfully harvesting the vermicompost, it is crucial to store it properly. The compost should be kept in a cool, dry place or in airtight containers to maintain its quality. When ready to use, vermicompost can be applied directly to garden beds or mixed with potting soil for potted plants, providing a nutrient-rich amendment that supports healthy plant growth.
Troubleshooting Common Issues in Vermicomposting
Despite its simplicity, vermicomposting can occasionally present challenges that affect the performance of your composting system. Understanding these issues and implementing effective solutions can enhance your experience and the health of your worm population. One common problem is the occurrence of unpleasant odors. If your bin develops a foul smell, it often signifies overfeeding or the presence of anaerobic conditions due to excess moisture. To remedy this, evaluate the balance of food scraps being added. Ensure the scraps are finely chopped, and mix them with dry bedding materials like shredded newspaper or cardboard to absorb excess moisture and promote aeration. Additionally, regular turning of the compost can help alleviate odor.
Fruit flies are another nuisance that can plague your vermicomposting setup. Their presence typically indicates overly moist conditions or exposed food scraps. To resolve this, it is advisable to bury food waste deeper within the bedding material, ensuring it is less accessible to fruit flies. Moreover, you might consider using a breathable cover on top of the bin to deter these pests without restricting airflow essential for worms. Maintaining a balanced environment with a proper carbon to nitrogen ratio also aids in reducing fruit fly infestations.
Worm escapes pose yet another challenge for beginners in vermicomposting. Worms may escape if conditions within the bin are unfavorable, such as excessive moisture, strong odors, or temperature fluctuations. To prevent this, continuously monitor the moisture levels, ensuring they remain damp but not waterlogged, and keep the environment within a moderate temperature range. Additionally, if you notice an unusual number of escaped worms, consider adjusting the bin's location to avoid direct sunlight or drafts. By recognizing these common challenges in vermicomposting and applying these practical solutions, you can foster a thriving worm population and create nutrient-rich compost more effectively.
For more information check my eBook below: